How To Use A Digital Thermometer Correctly | BMC Medical
A practical step-by-step guide to how to use a digital thermometer correctly, including preparation, instructions, common issues, tips, and next steps.
How To Use A Digital Thermometer Correctly
This guide provides a detailed, step-by-step process for accurately measuring body temperature using a standard digital thermometer. Correctly taking a temperature is a fundamental skill for home health monitoring, allowing you to gather reliable information when you or a family member feels unwell. This information can be vital when communicating with a healthcare professional. Please note, this guide is for educational purposes and is not a substitute for professional medical advice, diagnosis, or treatment.
Fast Answer
- Preparation: Clean the thermometer probe with soap and water or an alcohol wipe.
- Placement: Place the tip under the tongue (oral), in the centre of the armpit (axillary), or for infants, gently in the rectum.
- Measurement: Hold still and wait until the thermometer signals that the reading is complete, usually with a beep.
- Action: Read the final temperature on the display, then clean and store the device.
Before You Start
Proper preparation is essential for an accurate and hygienic temperature reading. Taking a moment to gather what you need and check for factors that could influence the result will ensure the information you collect is as reliable as possible.
What You Need
- A functional digital thermometer with a clear display and working battery.
- Disposable probe covers, especially if recommended by the manufacturer or for rectal use.
- Cool, soapy water or an isopropyl alcohol wipe for cleaning the probe.
- A clean, dry cloth for drying the thermometer.
- A notebook and pen, or a smartphone app, to record the readings.
Safety, Timing, and Context Checks
- Read the Manual: Every thermometer model can have slight variations in operation, such as the meaning of different beeps or symbols. Always review the manufacturer's instructions that came with your specific device.
- Check the Battery: If the screen is dim, flickers, or fails to turn on, the battery will likely need replacing. An old battery can sometimes lead to inaccurate readings before it fails completely.
- Wait After Activity: For the most accurate oral temperature reading, you must wait at least 15 to 20 minutes after eating, drinking hot or cold liquids, smoking, or engaging in exercise. These activities can temporarily alter the temperature in your mouth.
Step-by-Step Instructions
Follow these steps carefully to ensure you are taking a temperature reading that is both safe and accurate. The method of placement is the most critical variable and depends on the age and condition of the person.
Prepare and Clean the Thermometer
Begin by washing your hands with soap and water. Then, clean the thermometer itself. Using an alcohol wipe or a cloth with cool, soapy water, wipe down the probe tip and the lower part of the stem. Rinse it under cool running water, being careful not to submerge the digital display or battery compartment. Dry it completely with a clean cloth. If you are using a disposable probe cover, place it over the tip now.
Turn on the Device and Prepare for Measurement
Press the power button, which is usually the only button on the device. The screen will activate, often performing a brief self-test by displaying all its segments. After a moment, it should show a symbol indicating it is ready to measure. This is commonly a flashing '°C' symbol or a letter like 'L' (for 'low', not 'low battery'). This confirms the thermometer is calibrated and ready to begin.
Choose the Measurement Method and Place the Thermometer
The correct placement is the most important factor for accuracy. Choose the appropriate method based on the person's age and ability to cooperate.
Method 1: Oral (in the mouth)
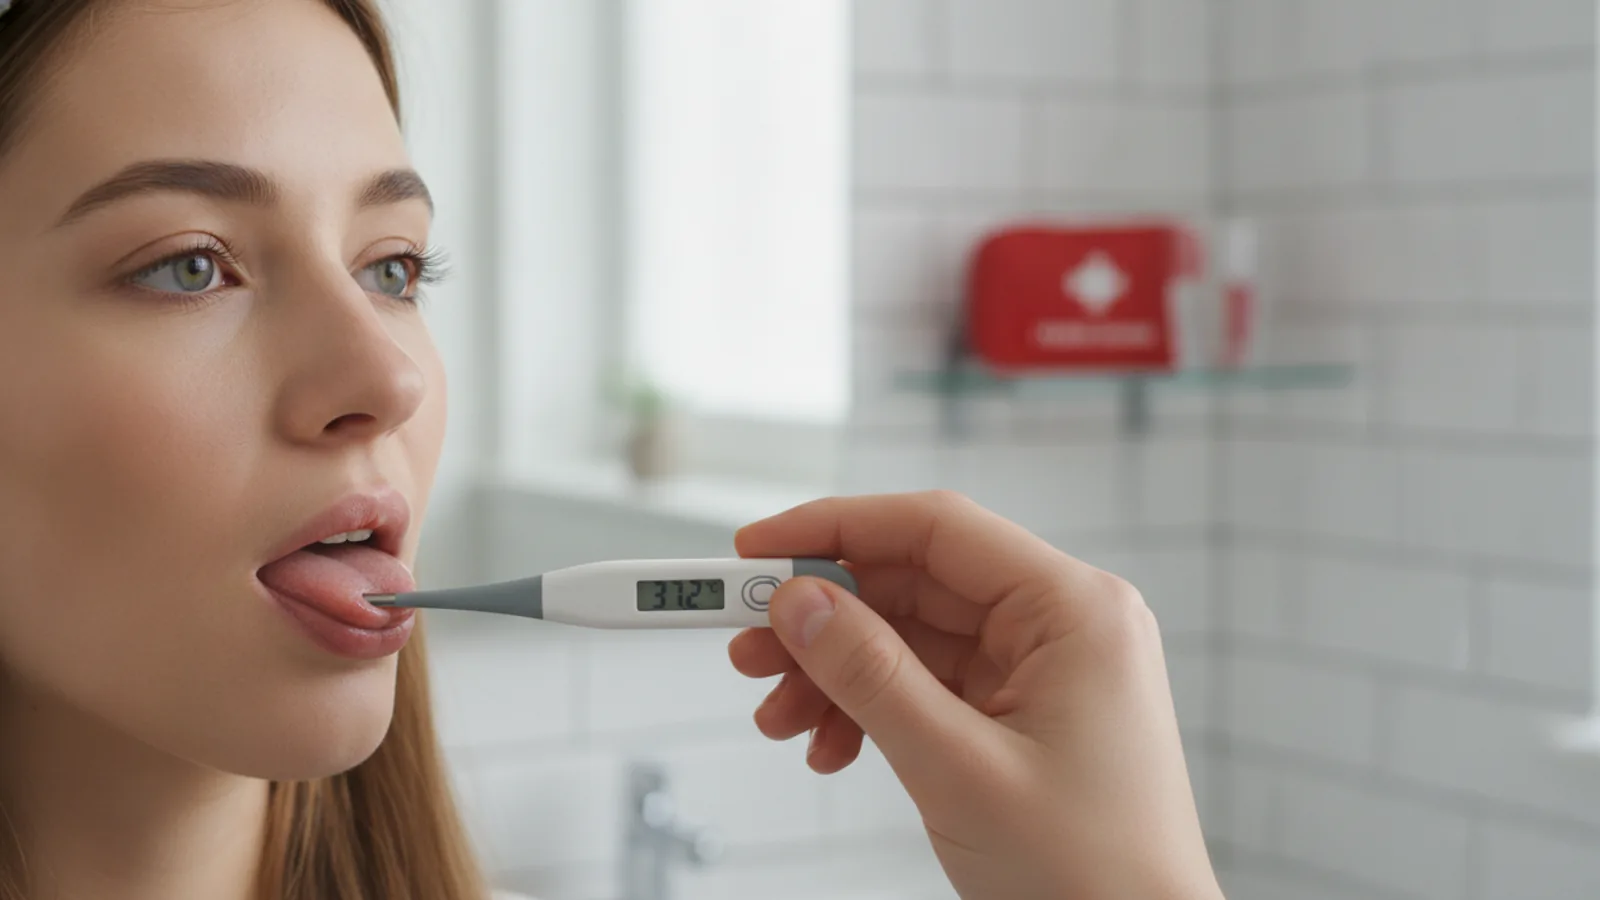
This is the standard method for adults and children who are old enough (typically over 4 or 5 years) to hold the thermometer correctly and safely in their mouth. Place the probe tip deep under the tongue into one of the two pockets at the back, known as 'sublingual heat pockets'. These areas provide a reading that is closer to the body's core temperature. Instruct the person to close their lips gently around the thermometer and breathe through their nose. They must not talk or bite down on the probe.
Method 2: Axillary (in the armpit)
The axillary method is less invasive but also generally considered less accurate than oral or rectal readings. It can be useful for a quick screening. Ensure the armpit is dry. Place the thermometer tip in the very centre of the armpit, ensuring it is touching skin and not clothing. Lower the arm and hold it firmly against the side of the body to create a seal and trap heat. For a child, you may need to gently hold their arm in place.
Method 3: Rectal (in the bottom)
This method is recommended by the NHS as the most reliable way to measure temperature in babies and children up to 3 years old. If using a probe cover, place it on the tip and apply a small amount of water-soluble lubricant. Lay the baby on their back and raise their thighs toward their chest, as if changing a nappy. Gently insert the lubricated tip about 1.5 to 2.5 cm (roughly half an inch to one inch) into the rectum. Never force it. Hold the thermometer (and the baby) steady to prevent it from going in too far or falling out.
Wait for the Signal
Keep the thermometer in place without moving until it signals that the measurement is complete. Most digital thermometers will emit a series of beeps. This process typically takes between 30 and 60 seconds, but some models may be faster or slower. Resisting the urge to remove it before the signal is crucial for an accurate reading.
Read and Record the Temperature
Once the beeping signal sounds, carefully remove the thermometer. The final temperature will be clearly displayed on the screen. It's good practice to record the reading immediately. Note down three key pieces of information: the temperature, the time it was taken, and the method used (e.g., "38.2°C, 10:15 AM, Oral"). This context helps you and your doctor understand the progression of a fever accurately. Some thermometers have a memory function that shows the last reading, which can be a helpful feature.
Clean and Store the Thermometer
Turn the thermometer off by pressing the power button (many also have an automatic shut-off feature). If you used a disposable probe cover, discard it. Clean the probe again with soap and water or an alcohol wipe, just as you did in the first step. Dry it thoroughly and return it to its protective case. Store it in a safe, dry place away from direct sunlight and out of the reach of children.
Quick Reference
| Situation | Recommended Method | Why |
|---|---|---|
| Infants and toddlers (under 3 years) | Rectal | Provides the most accurate measurement of core body temperature in this age group. |
| Children (over 4-5) and Adults | Oral (under the tongue) | Accurate, convenient, and reflects core temperature well when done correctly. |
| Quick screening, or if oral is not possible | Axillary (armpit) | Simple and non-invasive, but is less accurate. If it suggests a fever, consider confirming with another method if possible. |
Common Problems When You Use A Digital Thermometer
Even with a simple device, issues can arise. Here are solutions to the most common problems encountered when trying to use a digital thermometer correctly.
- The Reading Seems Unusually High or Low: This is the most common issue. First, check for environmental factors. Was the temperature taken right after a hot drink or a cold compress? Wait 20 minutes and try again. Second, verify placement. An oral thermometer not deep enough under the tongue, or an axillary one not snug against the skin, will give a falsely low reading. Finally, a weak battery can sometimes cause erratic results before it fails completely.
- The Thermometer Shows 'Err' on the Screen: An error message usually indicates that the thermometer was moved too much during the reading, or that it was not positioned correctly to get a stable measurement. Reposition the thermometer and try to remain as still as possible during the next attempt. If the error message persists across multiple attempts, it may indicate a fault with the device.
- The Device Won't Turn On: In almost all cases, this means the battery is depleted. Most digital thermometers use a small, flat 'button cell' battery. Consult your instruction manual for the correct battery type and how to open the battery compartment, which is often secured with a small screw for safety.
- The Beeping is Confusing: Many thermometers use a steady, repeated beep to indicate the measurement is complete. However, some models use a different, more urgent beeping pattern to signal that a fever has been detected. This can be confusing. Reading your device's manual will clarify what its specific audio signals mean.
Advanced Tips for Using a Digital Thermometer Correctly
To get the most value from home temperature monitoring, consider these more nuanced points.
- Establish a Baseline: A person's "normal" temperature can fluctuate slightly. Measuring your temperature and your family members' temperatures a few times when you are all healthy can provide a useful baseline. Knowing that someone's normal is 36.6°C makes a reading of 37.8°C more significant than it might be for someone whose baseline is 37.1°C.
- Understand Relative Differences: Be aware that the reading will differ based on the method used. As a general rule, a rectal temperature is considered the most accurate core reading. An oral temperature is typically about 0.5°C lower than a rectal one, and an axillary (armpit) temperature is typically about 0.5°C lower than an oral one. This is why recording the method is so important for consistency.
- Focus on the Trend, Not Just One Number: A single temperature reading is a snapshot in time. A series of readings taken every few hours provides a much clearer picture of how an illness is progressing. A fever that is steadily climbing is a different clinical picture than one that is fluctuating or slowly decreasing.
- Fever Definitions: In the UK, the NHS generally considers a temperature of 38°C or higher to be a fever. However, how you should respond depends on age, existing health conditions, and other symptoms. Always seek professional medical advice from your GP or NHS 111 if you are concerned, especially for young babies, the elderly, or individuals with weakened immune systems.
How To Use A Digital Thermometer Correctly FAQ
Here are answers to some frequently asked questions about using digital thermometers at home.
Can I use the same thermometer for oral and rectal readings?
While you can technically do this if the thermometer is sterilised between uses, it is strongly discouraged for hygiene reasons. The best practice is to have two separate digital thermometers, clearly labelled for either "Oral/Axillary Use" or "Rectal Use Only" to prevent cross-contamination.
Are forehead or ear thermometers better?
Forehead (temporal) and ear (tympanic) thermometers measure temperature differently and can be very accurate when used correctly. However, their use requires a specific technique, and factors like earwax (for ear models) or sweat (for forehead models) can affect accuracy. A standard digital thermometer, used with the correct oral or rectal technique, is often considered more reliable and less prone to user error for home use.
How do I know if my thermometer is still accurate?
Digital thermometers are generally very durable. If you are concerned about its accuracy, you can perform a simple ice water test. Fill a glass with ice and add a little cold water. Stir and let it sit for two minutes. Place the thermometer tip in the centre of the icy water, not touching the sides of the glass. It should read 0°C (or 32°F). If it is significantly different, its calibration may be off, and it should be replaced.
What should I do if the reading shows a high fever?
This guide's purpose is to instruct on accurate measurement, not to provide medical advice. A high fever can be a sign of a serious illness. You should follow the guidance provided by the NHS website, contact NHS 111, or consult your GP for advice on how to manage the fever and when to seek further medical attention.
Final Checklist for Using a Digital Thermometer Correctly
Before putting the thermometer away, run through this final checklist to ensure you've covered all the important steps for a reliable and safe reading.
- Instructions Read: I have reviewed the specific instructions for my thermometer model.
- Cleanliness Check: I cleaned the probe before and after taking the temperature.
- Timing Check: I waited at least 15-20 minutes after any activity that could alter the reading (e.g., eating, drinking).
- Correct Method Used: I selected the most appropriate measurement method (oral, axillary, or rectal) for the person's age.
- Proper Placement: I ensured the thermometer tip was positioned correctly for the chosen method.
- Full Measurement: I waited for the thermometer to beep before removing it.
- Information Recorded: I wrote down the temperature, the time, and the method used.
- Safe Storage: The thermometer is now clean, dry, and stored in its protective case.